Grafana Cloud
Learn and build
Visualize data
Dashboards
Build dashboards
Create dashboards from templates and suggestions
Create dashboards from templates and suggestions
To start a new dashboard faster, you can use a pre-built template or a suggested dashboard. You can also create custom dashboard templates for your organization.
Dashboard templates
Note
Dashboard templates is currently in public preview. Grafana Labs offers limited support, and breaking changes might occur prior to the feature being made generally available. To try it out, enable the
dashboardTemplatesfeature toggle.
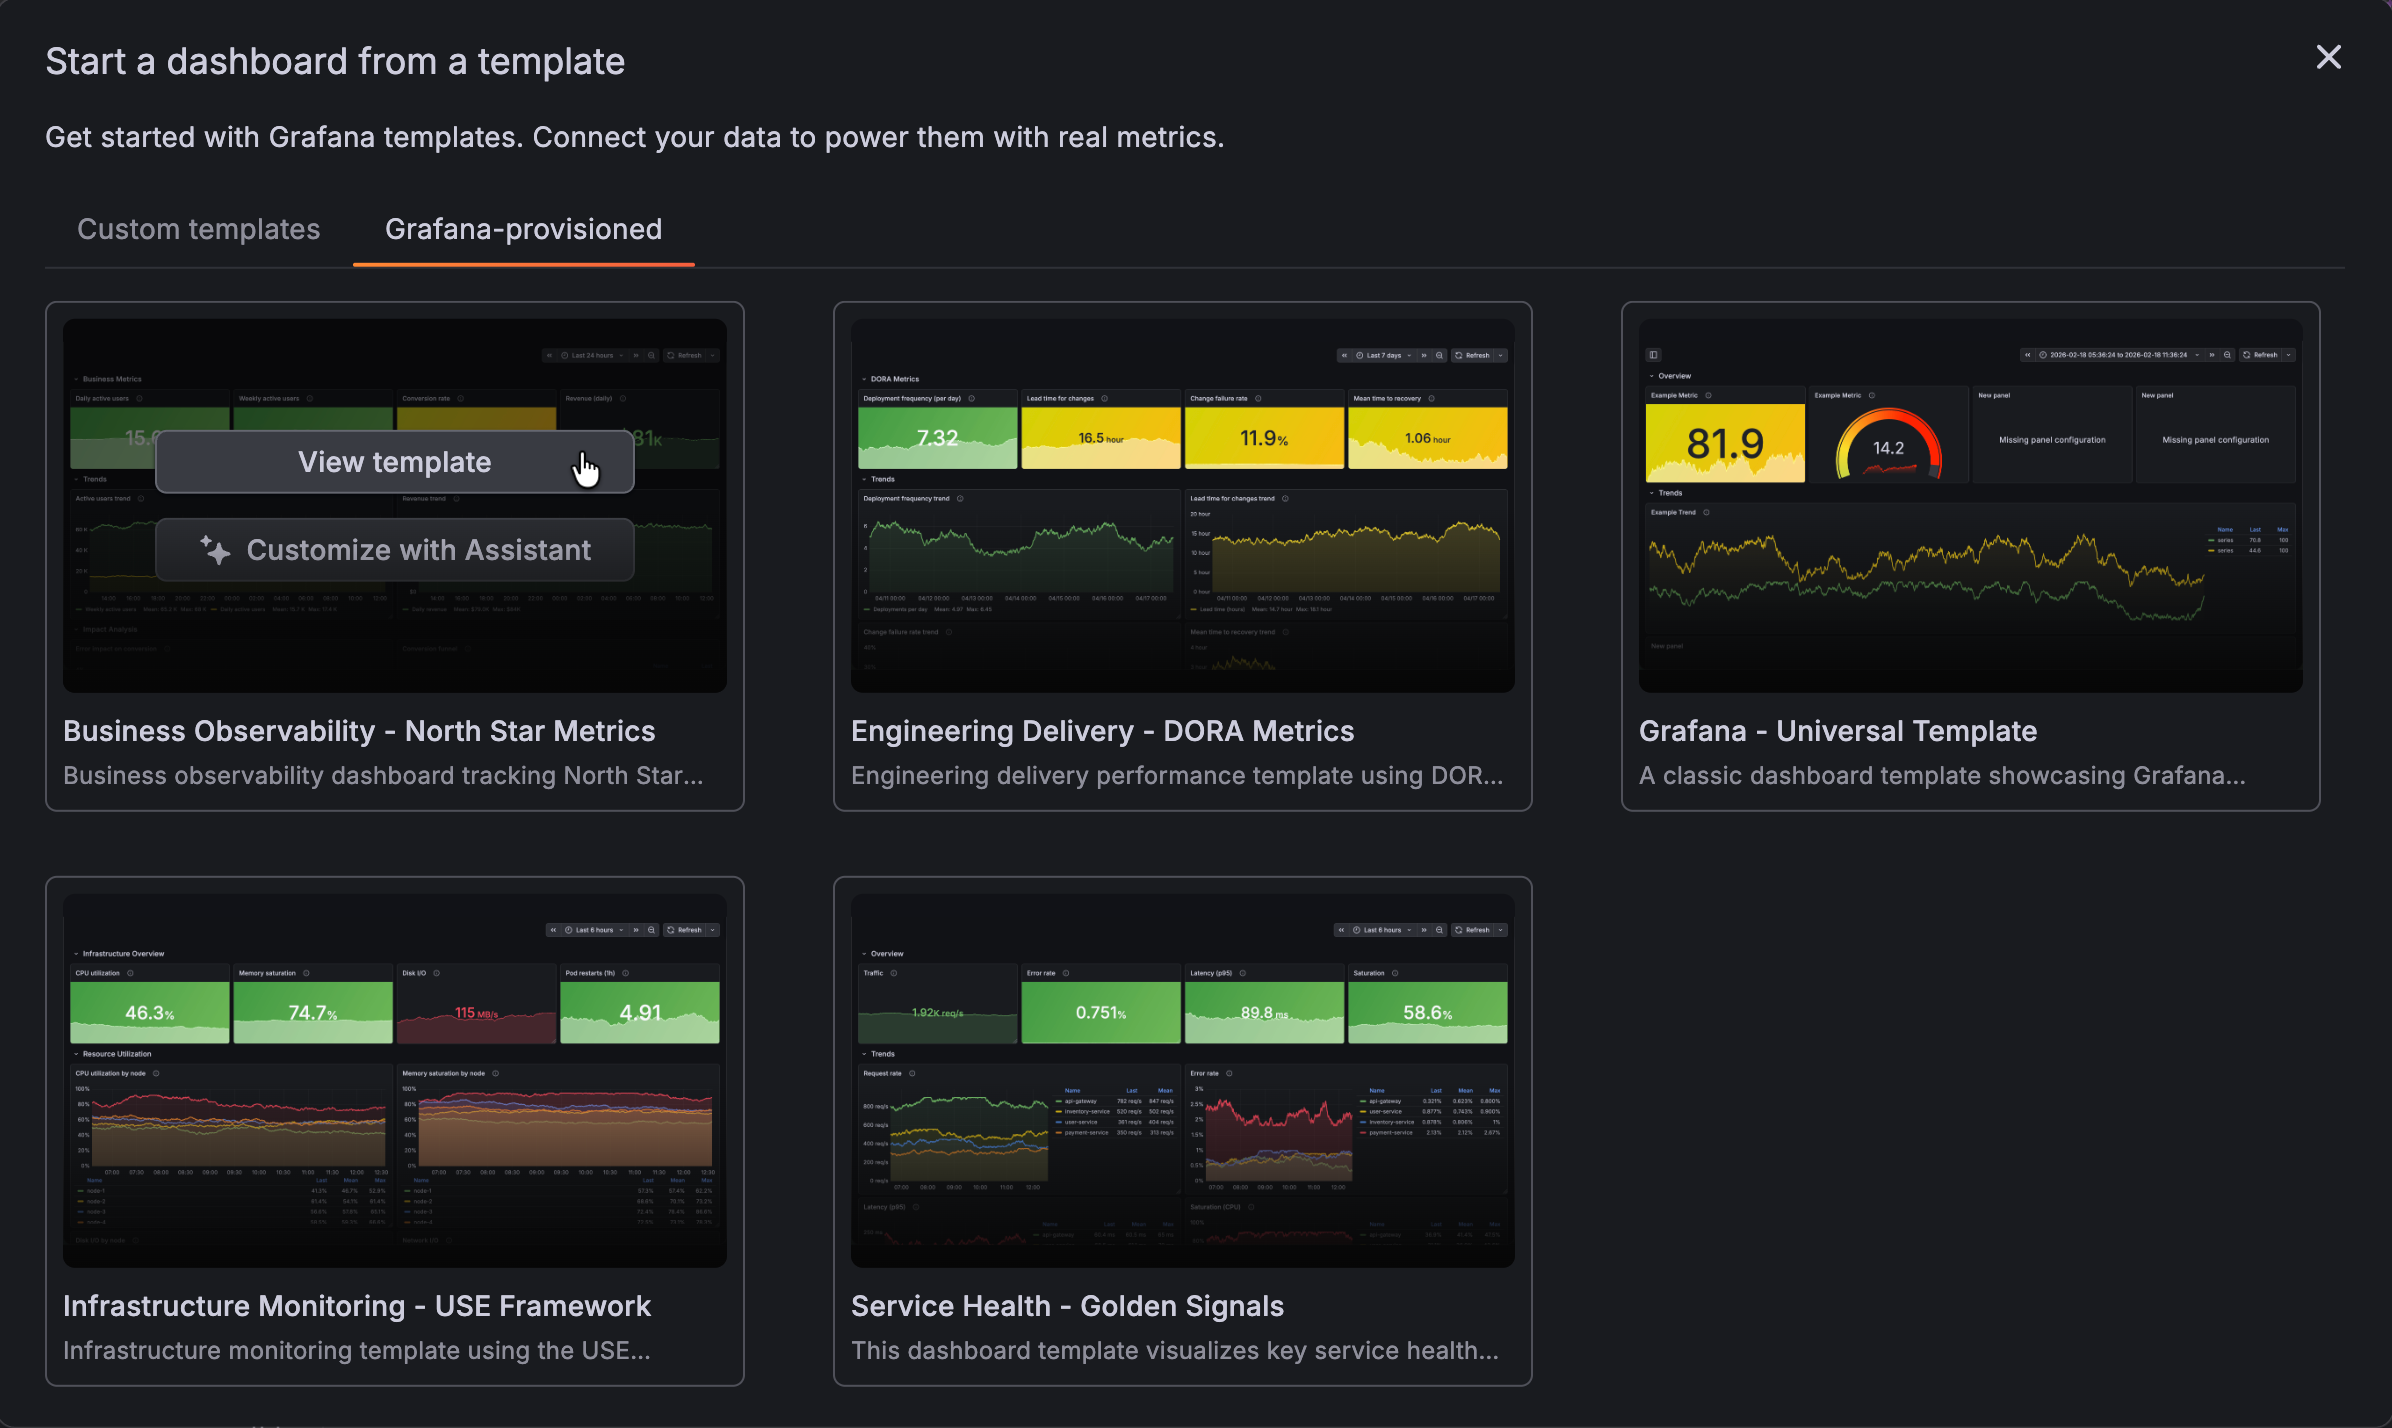
Grafana provides a variety of pre-built dashboard templates that you can use to quickly set up visualizations for your data. These dashboards use sample data, which you can replace with your own data, making it easier to get started with monitoring and analysis.
The templates provide standardized dashboard layouts designed to help you answer engineering or business questions consistently. For instance, the DORA template allows all teams within an organization to measure delivery performance using a widely adopted industry framework.
You can also create custom dashboard templates, giving users in your organization a consistent starting point for new dashboards.
Create dashboards from templates
To create a dashboard from a template, follow these steps:
Click Dashboards in the primary menu.
Click New and select Use template in the drop-down menu.
The Start a dashboard from a template dialog box opens.
Do one of the following:
- Stay in the Custom tab to select a template created by someone in your organization.
- Click the Grafana-provisioned tab to select templates included with Grafana.
Hover the cursor over the template you want to use and click View template.
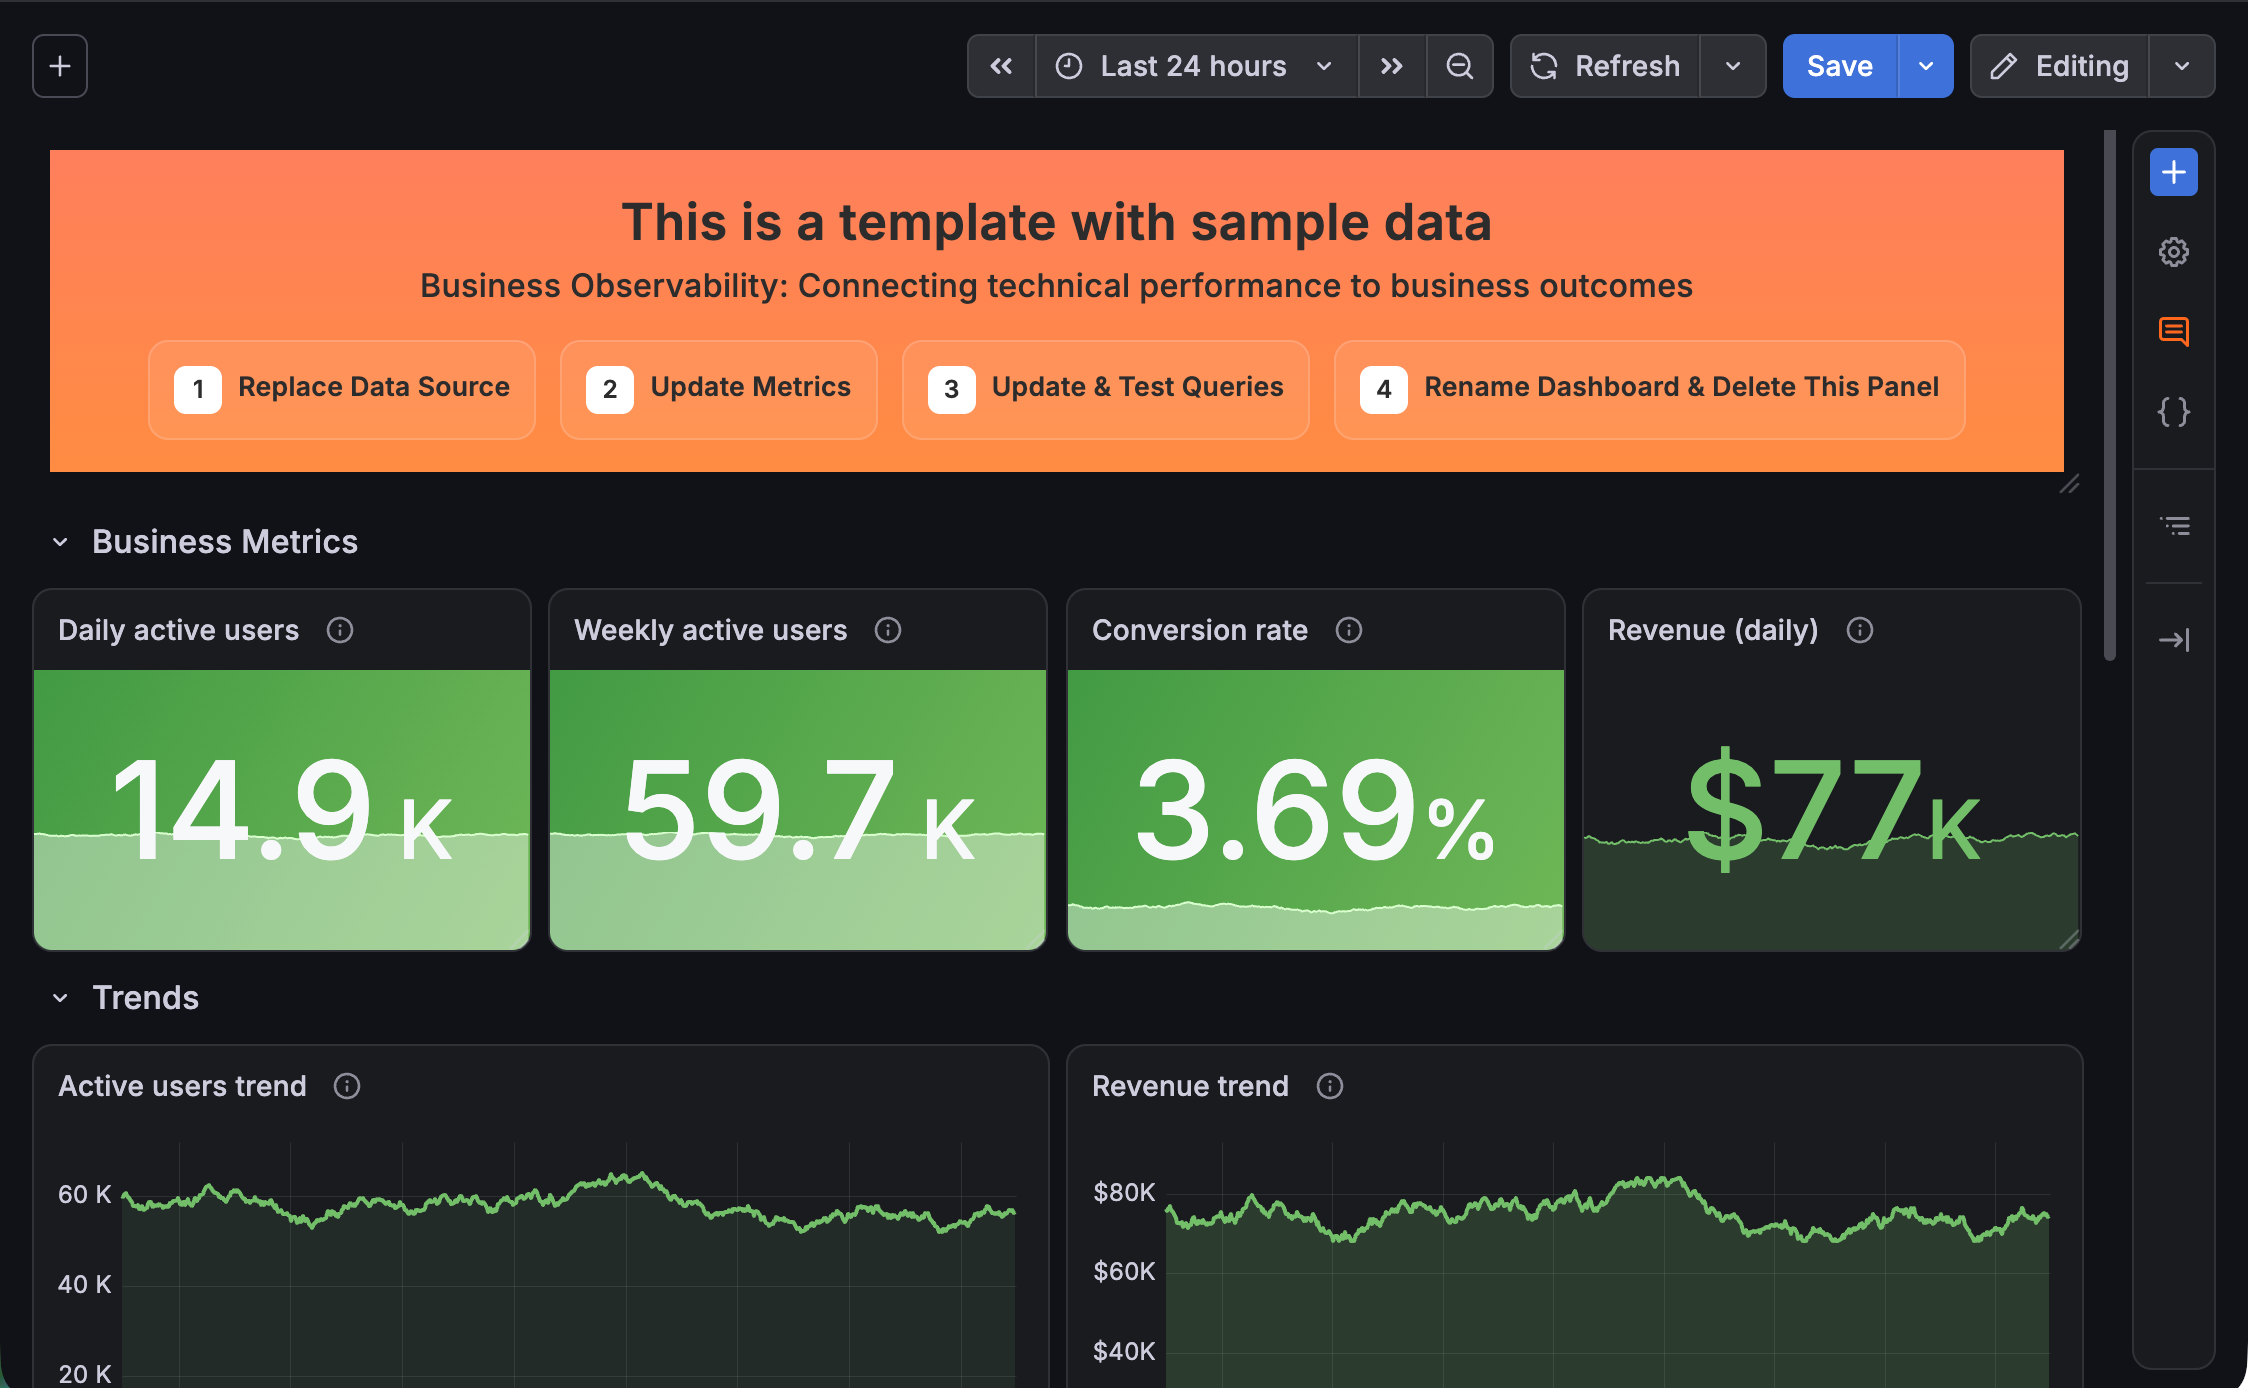
The dashboard created includes a banner panel indicating the dashboard is using sample data:
![Dashboard with sample data]()
Click Save in the top-right corner.
(Optional) Enter a new title for the dashboard.
(Optional) Select a folder for the dashboard.
Click Save.
Update the data source for each panel to add your own data and configure the queries you need.
In Grafana Cloud, you also have the option to customize the template using Grafana Assistant.
Make any other edits to the dashboard to most effectively display your data.
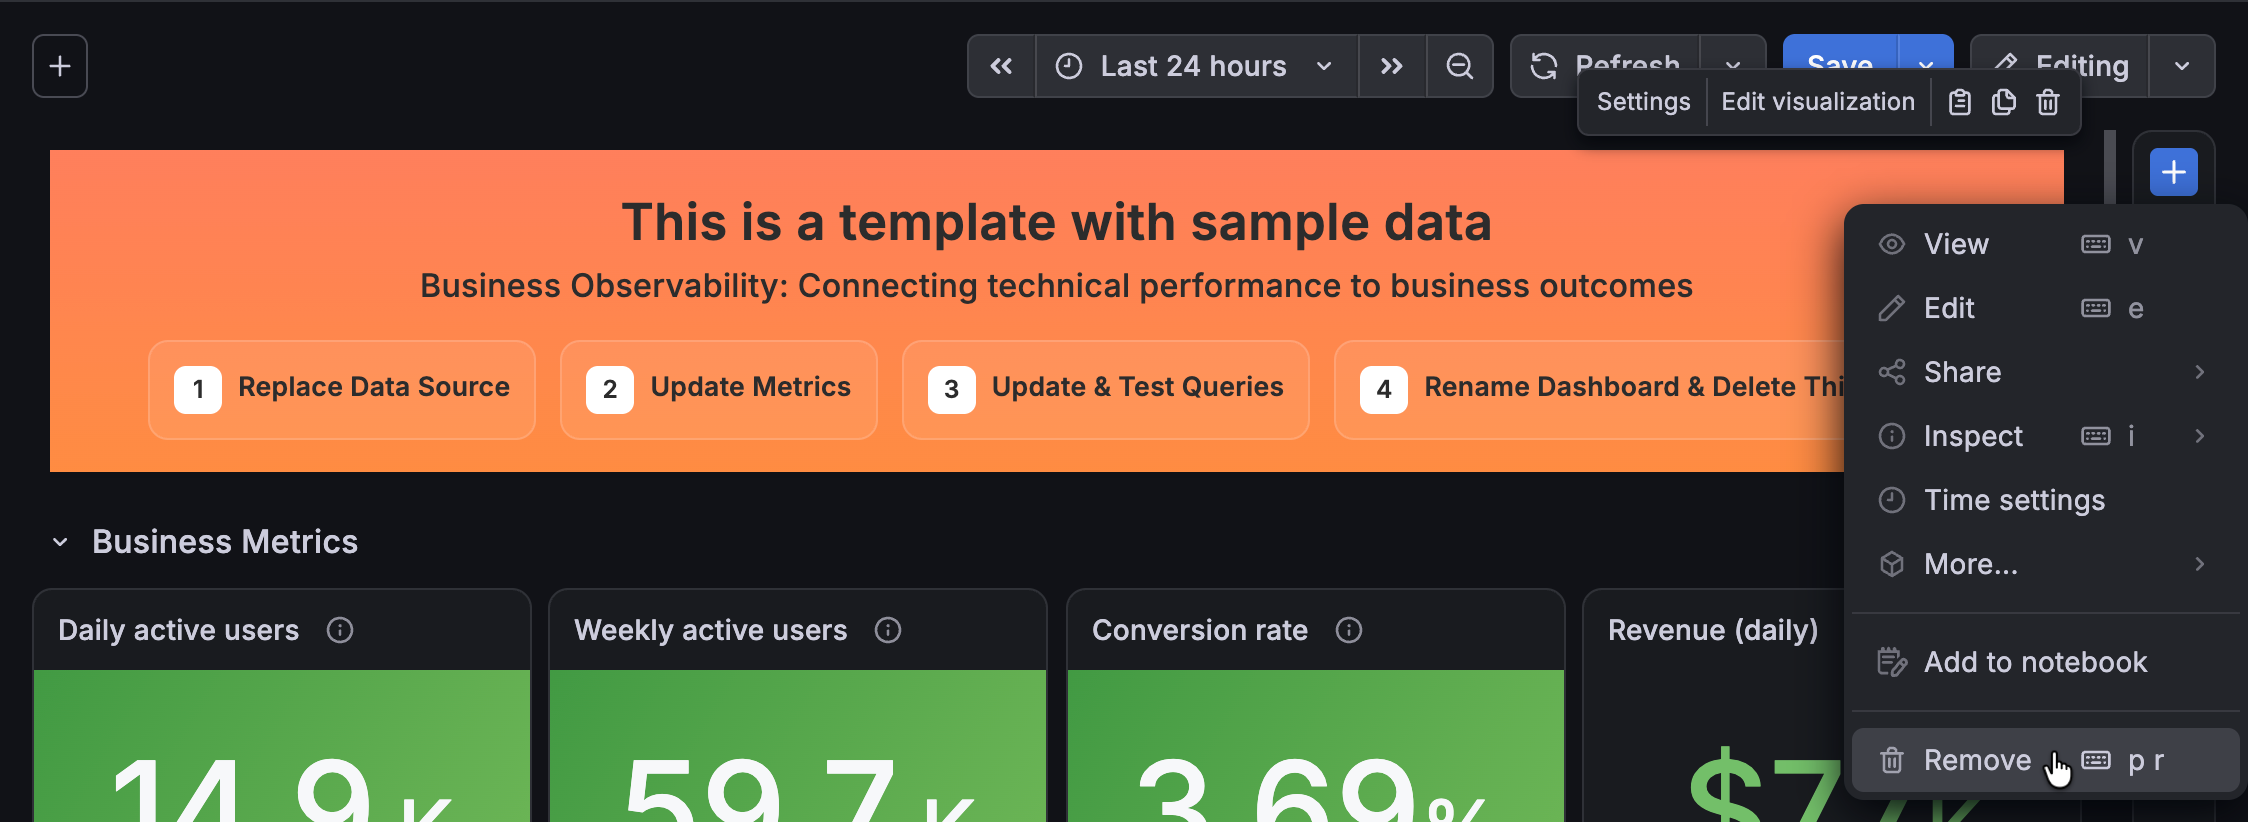
When you’ve made all of your changes, hover the cursor over the top-right corner of the banner panel to open the panel edit menu, and then click Remove to remove the panel.
![Removing the sample data banner panel]()
Click Save.
Enter an optional description of your updates, and click Save.
Create custom dashboard templates
Note
Custom dashboard templates is currently in public preview. Grafana Labs offers limited support, and breaking changes might occur prior to the feature being made generally available. To try it out, enable the
dashboardTemplatesandgrafana.customDashboardTemplatesfeature toggles.Custom dashboard templates is only available in Grafana Cloud and Enterprise.
A custom dashboard template gives you and your team a consistent starting point for new dashboards. You can use it to apply your organization’s preferred layout, panels, and settings.
To create a custom dashboard template, follow these steps:
Create or navigate to a dashboard that you want to use as a template.
When you’re satisfied with the dashboard, click Save > Save as template.
Enter a unique title for the template.
This name is separate from the dashboard title.
(Optional) Enter a description and set tags for the template.
These are separate from the dashboard description and tags.
Click Save.
Now the template is available in the Custom tab of the Start a dashboard from a template dialog box. This is the dialog box that opens when someone selects the Use template option to create a dashboard.
Refer to the following sections for directions on editing or deleting custom dashboard templates.
Manage custom dashboard templates
After you create a custom dashboard template, you can edit or delete it at any time. You can also update its title, description, and tags. The following sections describe how.
Edit custom dashboard templates
To make changes to a custom dashboard template, follow these steps:
Click Dashboards in the primary menu.
Click New and select Use template in the drop-down menu.
The Start a dashboard from a template dialog box opens.
In the top-right corner of the template you want to manage, click the actions menu.
Click Edit.
The dashboard template opens in edit mode, displaying a banner indicating that this is a template. If you wanted to use the template rather than editing it, click the link in the banner.
Update the dashboard as needed.
Click Save.
(Optional) Enter a description of your changes in the Message field.
Click Save.
Click the dashboard mode selector and select Viewing.
Users who open the template now see the updated content.
Edit template metadata
A custom dashboard template can have the following metadata: title, description, and tags. While you must have a template title, you’re not required to set template descriptions or tags. You can view or update these in the Template tab of the dashboard Settings page.
These metadata are separate from the title, description, and tags of the underlying dashboard. You can find those in the General tab of the dashboard settings.
To update the template metadata, follow these steps:
Click Dashboards in the primary menu.
Click New and select Use template in the drop-down menu.
The Start a dashboard from a template dialog box opens.
In the top-right corner of the template you want to manage, click the actions menu.
Click Edit.
The dashboard template opens in edit mode, displaying a banner indicating that this is a template.
Click the Dashboard options icon in the toolbar to open the sidebar.
In the sidebar, click View all settings.
In the Template tab, update the template title, description, and tags, as needed.
Click Save.
Tip
You can also delete a template from the Template tab using steps 4-6 of the following directions.
Delete custom dashboard templates
To delete a custom dashboard template, follow these steps:
Click Dashboards in the primary menu.
Click New and select Use template in the drop-down menu.
The Start a dashboard from a template dialog box opens.
In the top-right corner of the template you want to manage, click the actions menu.
Click Delete.
Type “Delete” into the provided field.
Click Delete.
This action is permanent and you can’t recover deleted templates.
Suggested dashboards
Note
Suggested dashboards is currently in public preview. Grafana Labs offers limited support, and breaking changes might occur prior to the feature being made generally available. To try it out, enable the
suggestedDashboardsfeature toggle.
Suggested dashboards can be helpful when you have a data source configured, but you’re not sure how to most effectively visualize your data. The process of creating a dashboard from a suggestion starts from the Data sources feature, so the suggestions are specific to your data source type (for example, Prometheus, Loki, or Elasticsearch).
The dashboards suggested are either provided by the data source plugin (provisioned) or come from the Grafana Community, and they are labeled to indicate this:

For Prometheus data sources, Grafana compares the metrics of your data source against those of the suggested dashboard to assess how much you might need to update the dashboard to make it useful. Using that analysis, Grafana assigns the dashboard a compatibility score:

Access the suggested dashboards for a data source by clicking the Build a dashboard drop-down list and selecting From suggestions:

The From suggestions option is only enabled if suggested dashboards are available for the data source. If there are no suggestions available, Grafana displays a warning, and you won’t be able to select the option.
Create dashboards from suggestions
To build a dashboard from suggestions, follow these steps:
Navigate to Connections > Data sources.
Go to the row of the data source for which you want to create a dashboard.
Click the Build a dashboard drop-down list and select From suggestions.
A dialog box with suggested dashboards opens.
Hover the cursor over the suggestion you want to use and click View dashboard.
In Grafana Cloud, you also have the option to customize the suggested dashboard using Grafana Assistant.
(Optional) Do one or more of the following:
- If there are more than six suggested dashboards, use the page numbers or arrow buttons at the bottom of the dialog box to navigate between pages of suggestions.
- To find a specific dashboard, enter the name of the dashboard in the search bar.
- If, after viewing the suggested dashboard, you find it doesn’t meet your needs, go back and choose a different suggestion or start a new dashboard by clicking one of the options in the banner:
![Suggested dashboards banner]()
Complete the rest of the dashboard configuration.
Click Save.
(Optional) Enter a new title for the dashboard.
(Optional) Select a folder for the dashboard.
Click Save.

Customize templates and suggested dashboards with Grafana Assistant
In Grafana Cloud, you can customize a dashboard template or suggested dashboard using Grafana Assistant.
To use this option, hover the cursor over the template or suggestion that you want to use and click Customize with Assistant:

When you choose this option, a preconfigured prompt is entered into the Assistant chat to start the process:
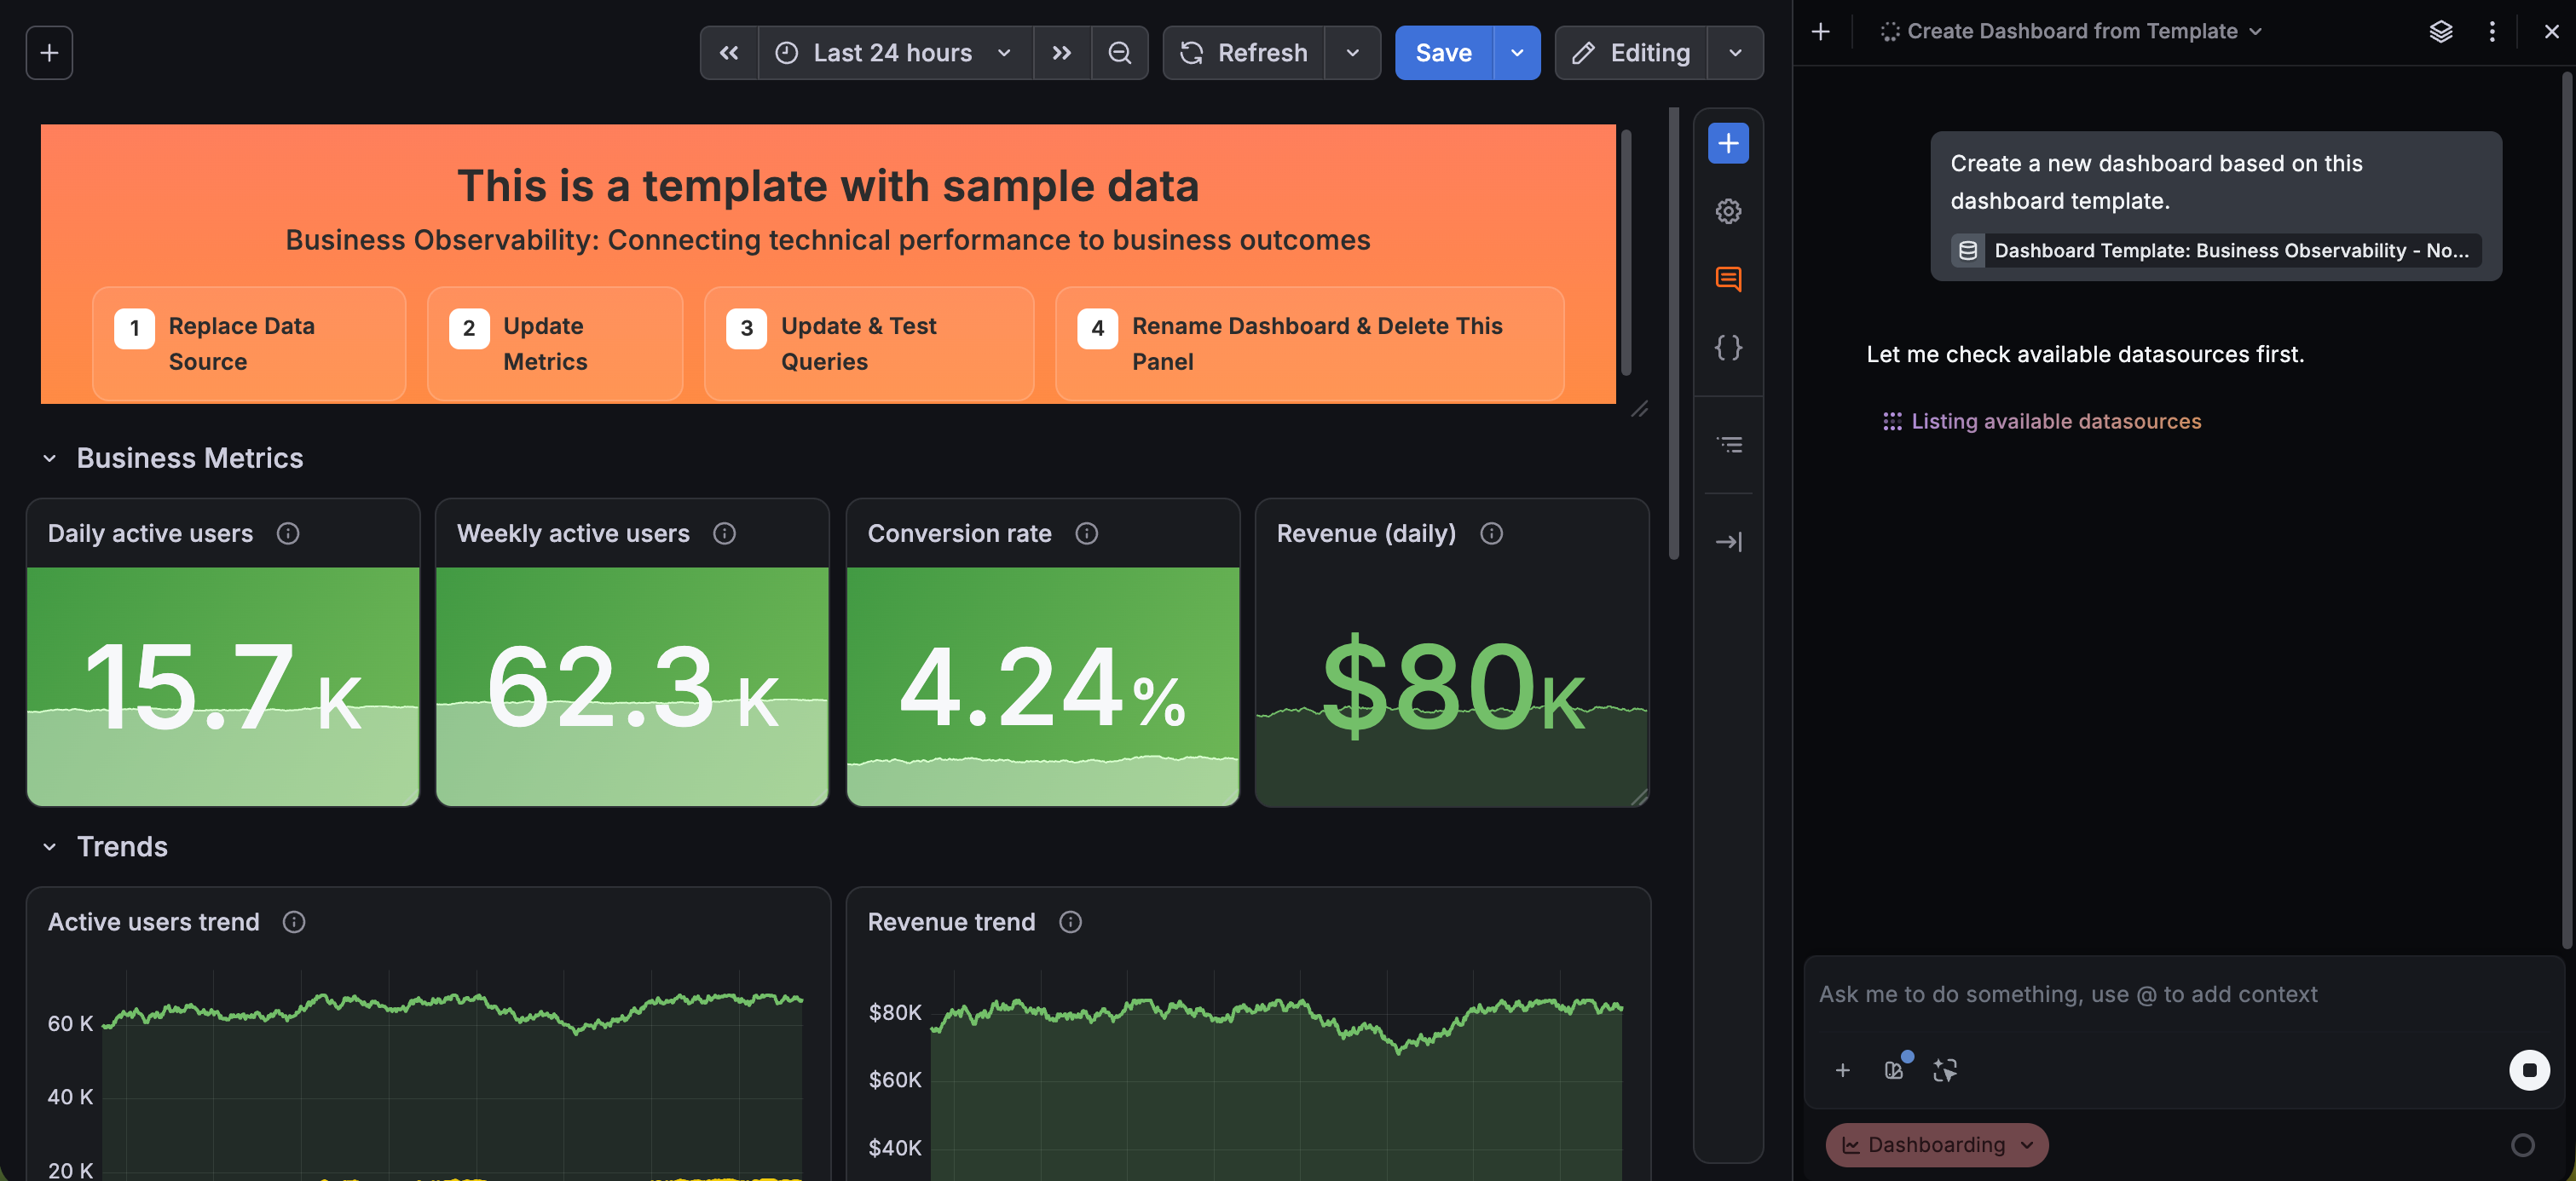
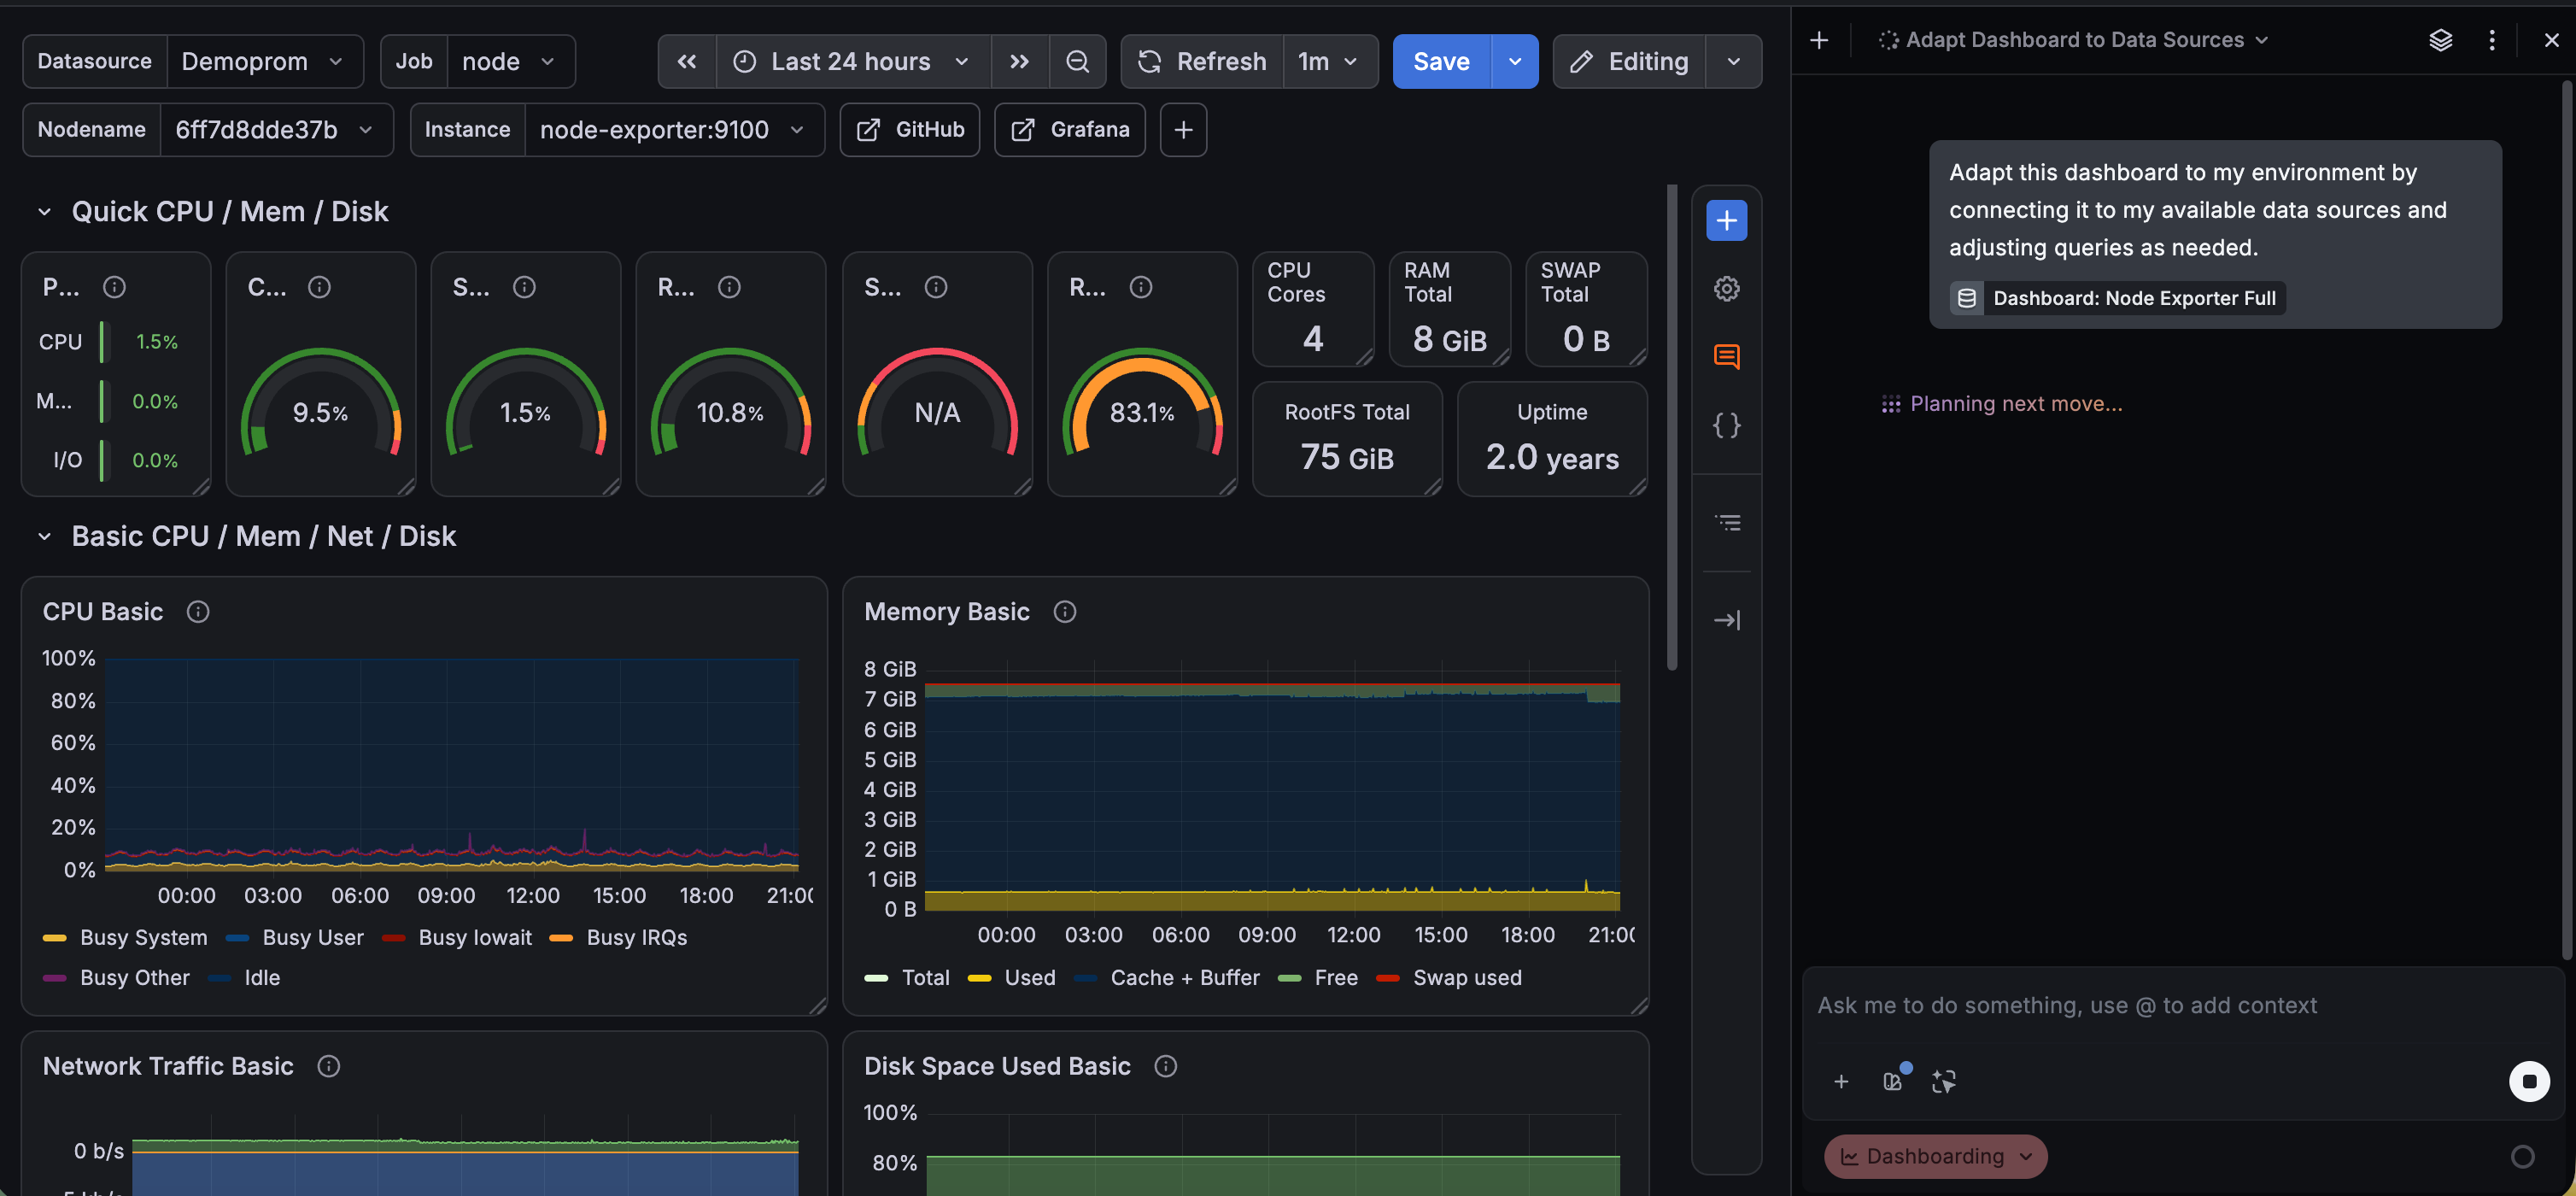
Grafana Assistant analyses the template or suggested dashboard, checks your available data sources, and guides the creation of a dashboard tailored to your environment. This lets you create a working, relevant dashboard from a template or suggestion without the need to manually map metrics and panels.
Grafana Assistant can query a subset of data sources, so customizing with Assistant for other data sources might generate poor results. For an up-to-date list of supported data sources, refer to the Assistant documentation.
Was this page helpful?
Related resources from Grafana Labs